System Maintenance
The Pane Maintenance
Clear Directory Cache
macOS contains a background service which communicates with the directory services configured for your system. This service is the central information broker needed to collect data about users, computers, IP addresses, user groups and many other things relevant to an operating system. Under special circumstances, the internal memory contents of this service may contain incorrect or outdated information, especially if your computer is accessing a name server or directory server which doesn’t work reliably, or if the network configuration has changed abruptly. This can result in unexpected delays (spinning rainbow cursor) especially when using network functions.
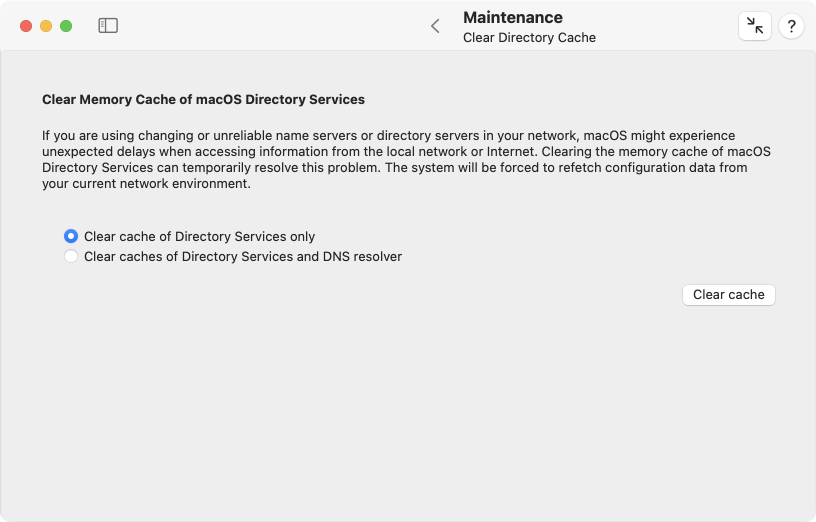
In this situation, clearing the online cache of directory services might correct the problem. The information broker will begin with fresh new data which it fetches from your network and the local computer. Note that this cache is not stored in any file. It is kept in the memory (RAM) of the directory services subsystem of macOS.
The word “directory” is sometimes used as a technical term for a folder storing files. This is not what is meant here. In this context, the word directory refers to an inventory list of names, objects and network addresses relevant to your computer. macOS is always running a directory service no matter whether the computer is connected to a network or not.
When retrieving data about names and network addresses of other computers, the directory services are not the only source of information which keep records in their internal cache memory for some time. The system service acting as “DNS resolver,” responsible for finding addresses for computer names and vice versa, assists the directory services in doing their job. When you clear the memory cache, you can decide whether only the records of directory services as such should be cleared, or if cached DNS information should be removed as well.
To clear the directory cache of macOS, perform the following steps:
- Open the sub-item Clear Directory Cache of the pane Maintenance.
- Select one the radio buttons to indicate if the cache of the DNS resolver should be included in the cleaning operation.
- Click the button Clear Cache.
Export directory data
As mentioned in the last section, directory services store important data about the local computer. Such a database is called a directory node. In professional networks, it is common not only to have a directory node on each computer, but also having one or more central databases managed by special directory servers. This allows to implement network-wide user accounts, for example, so that a user can log in to any computer in the network, while maintaining uniform file permissions for use on all disks and file servers.
When a change in the organization of the directory data should become necessary, e.g. because a new computer or a different operating system must be used, it is helpful to export specific types or all directory data from a directory node in order to reuse it on the other system. TinkerTool System supports such an export procedure. It can read all data types supported by Open Directory from all directory nodes bound to a Mac, and save the records to a text file.
Apple announced in April 2022 they would no longer support the software macOS Server. This app included a service to provide network-wide directory data via an Apple Open Directory Server. If such a server has to move to another operating system in the future, TinkerTool System can help to save its previous data so that all information can still be utilized without modification.
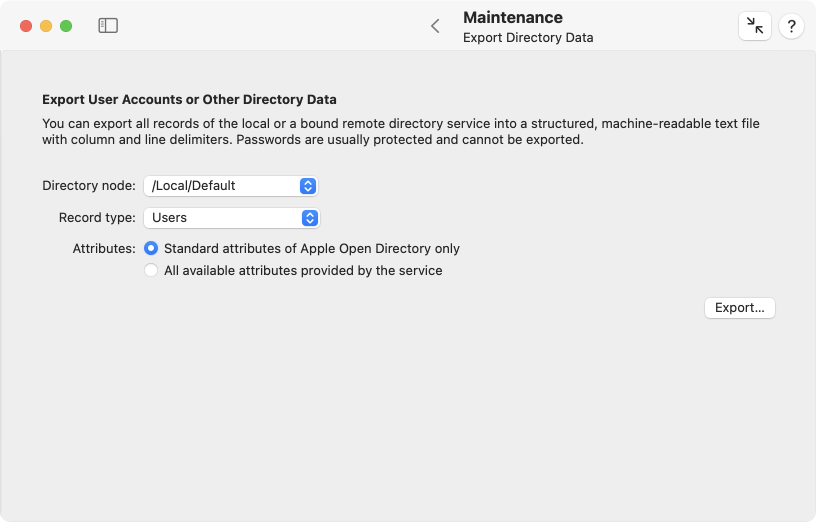
To export directory data to a text file, do the following:
- Use the pop-up button Directory node to select the service to read data from. The local database of macOS always has the name /Local/Default. All other directory data sources compatible with macOS this Mac is currently connected to are automatically listed and can also be selected using their official Open Directory node search paths.
- TinkerTool System automatically determines which data types are provided by the selected directory node. Choose the type of data to export under Record type.
- Determine whether to export only the common attributes of the selected data type that are dictated by the Open Directory standard, or whether to include all attributes that are “understood” by Open Directory.
- Click Export… and select location and name for the destination file.
If the export is successful, TinkerTool System will automatically open an inspection window after the file was saved. The window contains a table indicating which exact data has been saved, and is designed to provide a final check. The header fields of each column contain the official attribute names currently in use by the directory service. If attributes have been exported that don’t contain any text, they will be marked as Binary Data and are not evaluated further in this window.
The second step, i.e. the import into another operating system, usually has to be hand-tailored, so that software like TinkerTool System cannot help here. However, the generated text file has a machine-readable table structure that can be processed with usual standard tools for table or word processing. Experienced system administrators can usually customize the data in a few steps so that the information can be read by other computers. This way, Open Directory data can be imported into a database based on Microsoft Active Directory, Azure Active Directory or a Unix server with an LDAPv3 database according to RFC 2307, for example. Depending on version, target systems with macOS may offer the dsimport command to process the text file immediately without any intermediate steps.
Locate Database
Because macOS is a UNIX system, it comes with the program locate, a command-line application which quickly finds files by their names or parts of their names. locate usually finds names more quickly than Spotlight and includes both visible and invisible files in its search. Like Spotlight, locate needs an internal database to do its job. This database is updated in regular intervals to ensure that the program has current information about new and deleted files.
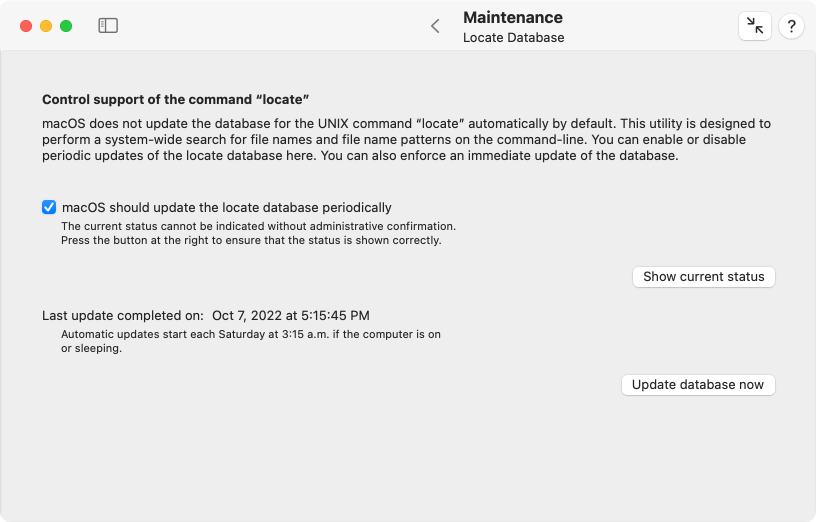
Because most users don’t work with macOS command-line programs, the automatic service that updates the locate database is switched off by default. Only administrative users are allowed to check whether the service is on or off. Perform the following steps to see if the update service is active or not:
- Open the sub-item Locate Database of the pane Maintenance.
- Click the button Show current status.
The current state will now be displayed by the check mark at macOS should update the locate database periodically. You can now either set the check mark to activate automatic maintenance of the database, or remove the check mark to shut down this service.
In a default installation of macOS, the system will update the locate database automatically each Saturday at 3:15 a.m. If your computer is off or in sleep mode at that time, the update is automatically postponed to a later date where the system is active. To enforce an immediate update of the locate database “now,” click the button Update database now.
Antivirus
For many years now, Apple has provided a built-in anti-virus program called XProtect as part of macOS. XProtect secures macOS against common computer viruses and malicious software (malware). The software is typically updated by Apple every two weeks in fully automatic fashion, assuming you have not explicitly disabled the option Install security updates and system files under General > Software Update > Automatic Updates > i in System Settings.
It’s part of XProtect’s design principle to work completely under cover. Apple does not advertise the program, nor does it point out its existence or activities on its own. However, many users would like to know if XProtect is properly enabled, what exactly it does in the background, and whether the latest version of the program is installed. All this information can be obtained by selecting Antivirus on the Maintenance pane.
At the top of the Antivirus section, under Current Status, you can see which version of XProtect is installed and when the last update was performed by your computer. The version code typically increases every two weeks by at least one digit. The status indicator Launch scanner indicates whether XProtect will be activated upon each program launch to check the integrity and secure origin of the respective application. The Background scanner indicator shows whether XProtect independently searches for known malware in the background, when given a suitable opportunity.
The data in the box Available Software can only be shown after you have clicked the button Check Apple Server. After that, you will see the latest version of XProtect that Apple currently offers for your macOS version and since when this is the case. If there is a discrepancy between the published and installed versions, you can click on the Immediate Update button to force macOS to download and install the most up-to-date version “now”.
Additional information about XProtect can also be found in the chapter The Pane Info. On the Info pane, Apple’s list of viruses and malware recognized by XProtect can be retrieved.
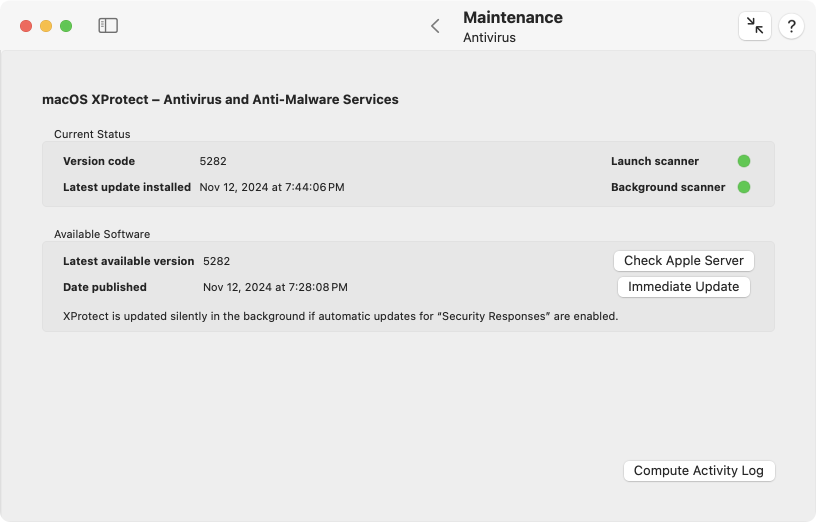
Finally, there is also the button Compute Activity Log available. Using this, you can retrieve the entire log of XProtect, currently stored in the macOS log database of your computer. This includes all background activities, updates, errors, warnings, and status messages. Administrator rights are required to obtain the protocol. Please note that macOS keeps the protocol in English only.
Shared User Folder
macOS provides a special folder on the system volume which can be found at Users > Shared. The folder is designed to be utilized by all accounts of a Mac, sharing files locally for common usage. Sharing of data is made possible by specific settings that grant read and write permissions to everyone. At the same time, other settings ensure that only the creator (and hereby owner) of a file has the right to delete this file at a later time, without the risk to inadvertently remove data of others users.
Many applications by Apple and other vendors use this folder as well, to automatically save data that could be interesting to all users. This includes license or registration data. For example, the application Music uses hidden contents in this folder to store licensing information for the use of copyright-protected media.
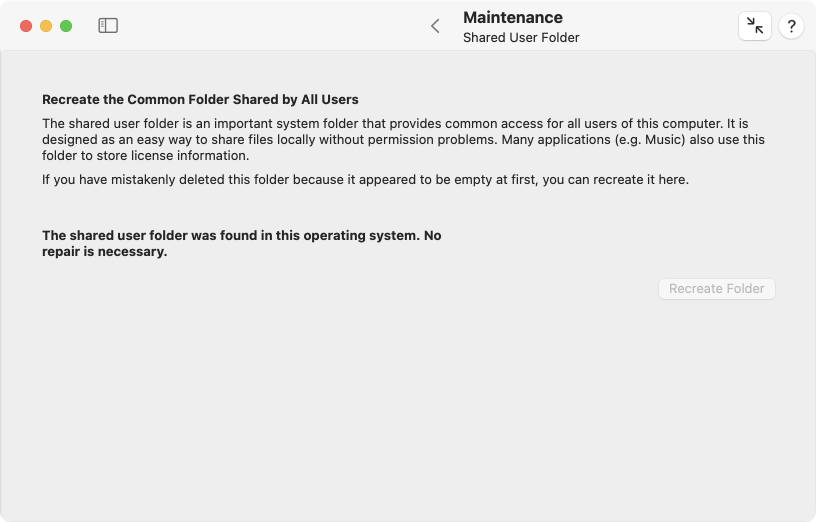
Some users remove this important system folder because it is initially empty and appears to serve no obvious purpose. This can lead to failures and errors in many applications, however. Due to the special settings for this folder, it is not easy to recreate it correctly.
TinkerTool System checks whether the folder exists on your Mac. If not, you can choose to recreate it in its correct original form, hereby repairing the operating system.
- Open the sub-item Shared User Folder of the pane Maintenance.
- Click the button Recreate folder.